Hosted onboarding
Generate a link to a co-branded onboarding application from the Dashboard or the onboarding API. Any existing information you have for a new account, such as names and addresses, can be prefilled. When you send a link, a secure session is created and the account owner is prompted to complete the form and sign up for access to Moov. The form can be set to redirect to your app upon completion.
Hosted onboarding is the easiest way to create accounts. Only accounts onboarded through hosted onboarding have access to their own Dashboard.
Onboarding experience
The business or individual will need to create an account with Moov to access the form. During this process, they'll give permission for you to move money and perform actions on behalf of their account, and they'll view and agree to the pricing disclosure for the plan you've selected.
Once an account has been created, they can start and pause the session, filling out the form at their convenience on their own computer or phone. The account holder should double check any prefilled information for accuracy.
In addition to basic information, business accounts will be required to provide owners and control officers. The onboarding form supports uploading documents for this purpose.
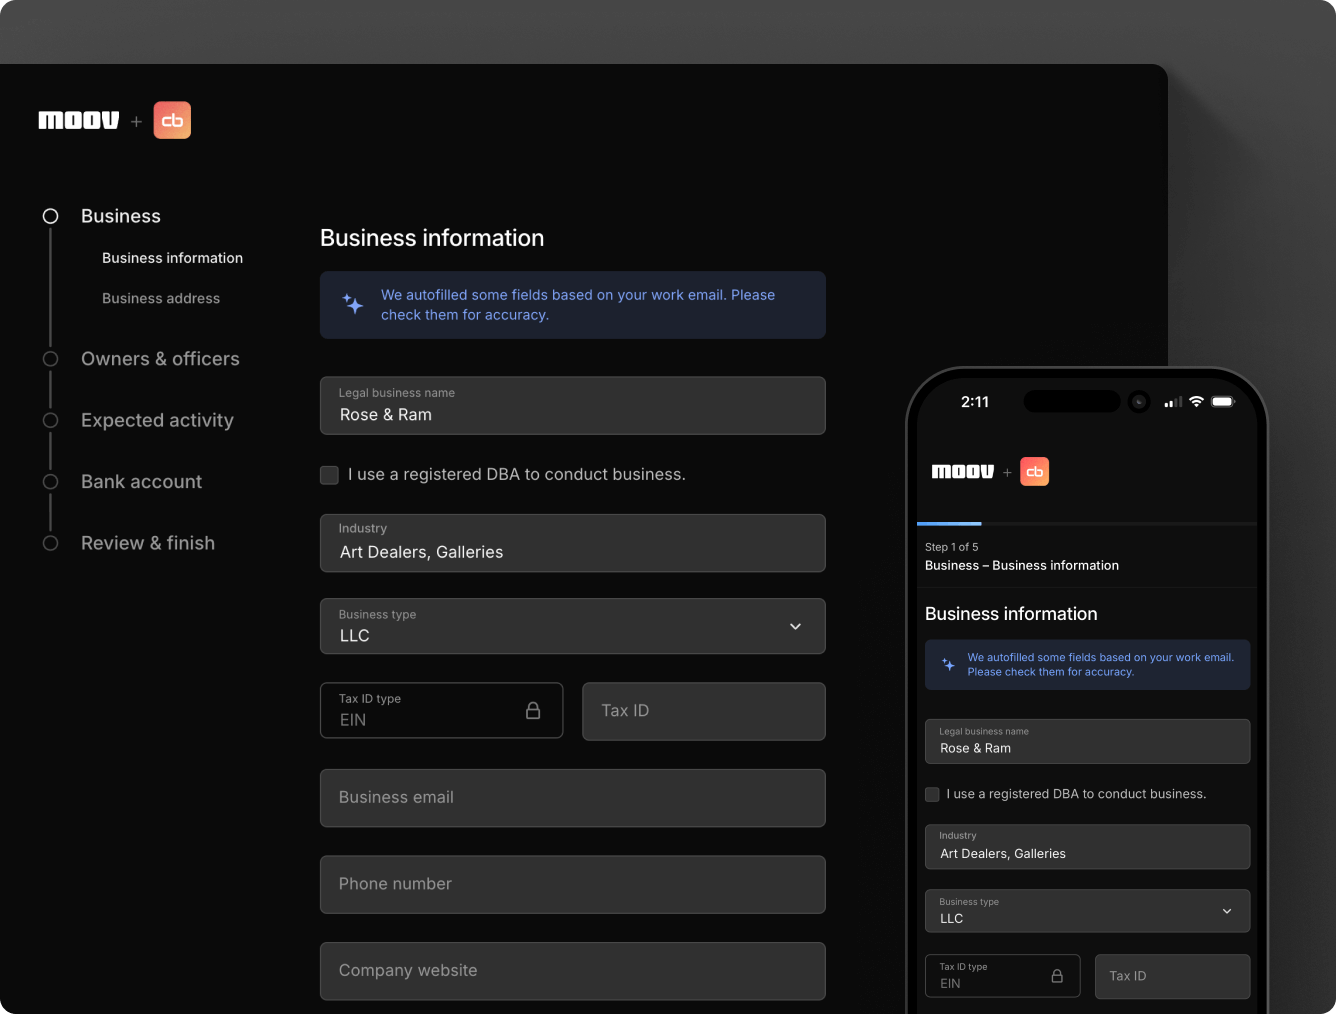
Your branding
Hosted onboarding contains several references to your own brand, including:
- Your logo and company name displayed throughout the onboarding flow
- Page title and meta description includes your company name
- Social share image includes your logo
- Accent colors for both light and dark mode
- If set, the
returnURLwill redirect the user to your app upon completion of the form - If set,
termsOfServiceURLwill reference your terms of service within the hosted onboarding flow alongside Moov's platform agreement and privacy policy
Brand accent colors can be set by navigating to Settings in the Dashboard or with the enrichment API. The return URL and terms of service URL can be set when creating an onboarding link in the Dashboard (under Advanced options) or with the onboarding API.
Create a link
Create a link and send a form to a business or individual to fill out at their convenience. Form links will expire upon completion and attempts to access a completed form will result in a 404 error.
When you create a link you'll need to provide the desired account type, capabilities, scopes, and fee plan. Sole proprietors must be created with a business profile (businessType.soleProprietorship in the API, or Business type > Sole proprietorship in the Dashboard).
Navigate to Accounts > Onboarding links to create a new onboarding link or view the status of links you've sent out for completion. You can also select New account > Onboarding link from the accounts list.
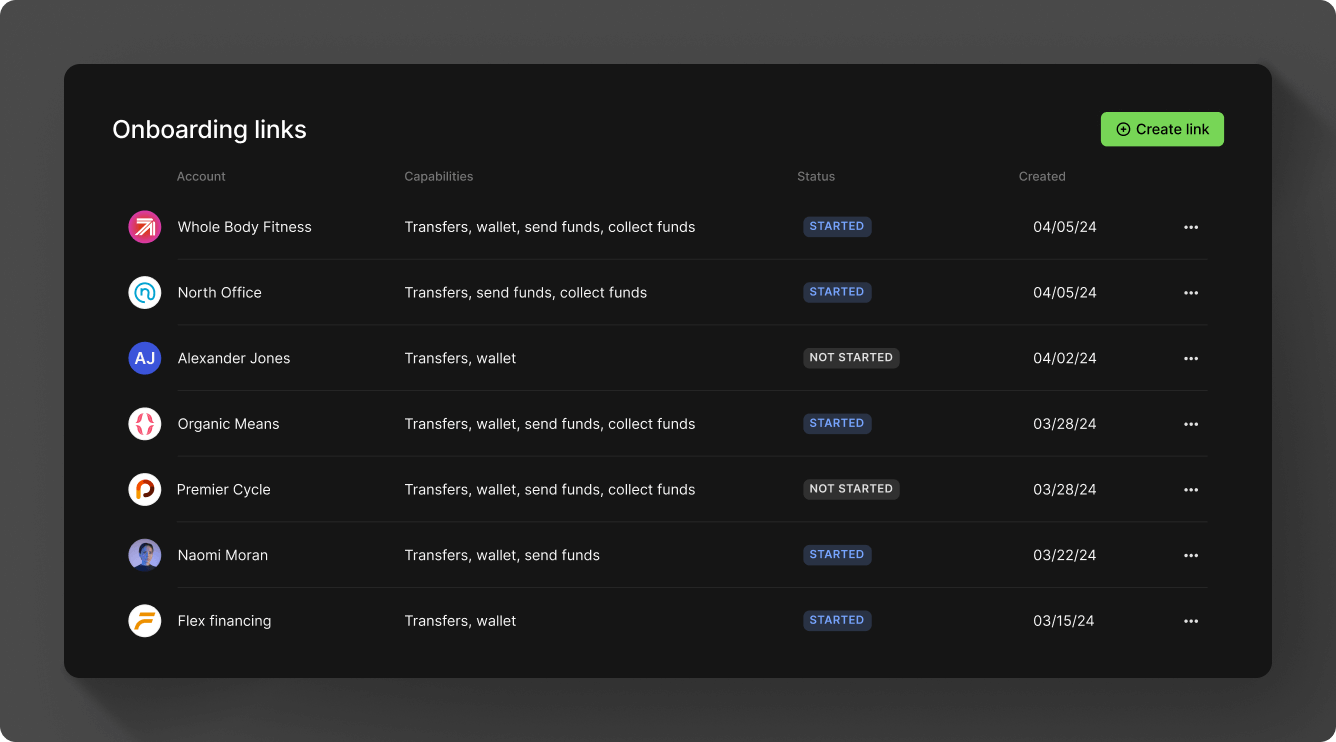
The onboarding form lets you prefill existing customer data like names and contact info, then select capabilities, scopes, and a pricing plan for the account.
Use the onboarding POST endpoint to create an onboarding link. You're required to send the following with your request:
- Capabilities
- Fee plan codes for the account
- Scopes
Additionally, you can send a custom return URL, your terms of service URL, and prefill any account data.
Choose capabilities
Select a business or individual account type and choose the capabilities for the account. Capabilities allow Moov accounts to receive transfers or send money to other accounts. Each capability will have a set of requirements that need to be met before it can be enabled.
Capabilities allow you to accomplish the following:
- Authorize debit transfers
- Store funds with Moov
- Send funds to another account
- Collect funds from another account (business accounts only)
- Provide a virtual card to an account (business accounts only)
You can request the following capabilities depending on use case and need:
wallet.balancecollect-funds.achcollect-funds.card-paymentssend-funds.achsend-funds.instant-banksend-funds.push-to-cardcard-issuingmoney-transfer.pull-from-cardmoney-transfer.push-to-card
Visit the capabilities section for details about functions and requirements. To view and manage enabled capabilities on an account in the Dashboard, open the account's Capabilities tab.
Select fee plan
Select a standard plan, which has a $500 monthly transaction minimum, or set up a custom interchange plan. For some fees, you have the option of choosing an all-in model, or you can also assign specific fees based on fee types.
Once you create a plan, you can assign it to one account or reuse it for many accounts. New accounts must agree to and accept the fee plan before it can go into effect.
Plans use either flat rate or interchange cost-plus pricing.
When you set up an account with a fee plan, they will receive a pricing disclosure they need to accept. The pricing disclosure shows the rates for the following:
- ACH
- Card acquiring
- Instant payments (RTP)
- Transaction management fees
- Platform fees
- Network fees
In the API, use the fee plan endpoint to retrieve the fee plans available to use with an account. See pricing plans & disclosure below for how fees are charged.
Select scopes to share
Scopes specify what actions an account can take on Moov's platform. When you enable certain scopes for yourself and the new account, you create connections between your account, the merchant account, and the merchant's customers:
A partner gains visibility across every connected account, while businesses can only access their own customers (see connected accounts for the partner, merchant, and customer roles). The following scopes can be shared by a partner with other accounts:
accounts.readaccounts.writeanalytics.readapple-pay-merchant.readapple-pay-merchant.writeapple-pay.readapple-pay.writebank-accounts.readbank-accounts.writecapabilities.readcapabilities.writecards.readcards.writedocuments.readdocuments.writefed.readfiles.readfiles.writeissued-cards.readissued-cards.writeissued-cards.read-privatepayment-methods.readping.readprofile-enrichment.readprofile.readprofile.writeprofile.disconnectrepresentatives.readrepresentatives.writetransfers.readtransfers.writewallets.read
In the Dashboard, Moov preselects some scopes based on general usage of Moov's platform. Select Edit scopes to enable a different set of scopes.
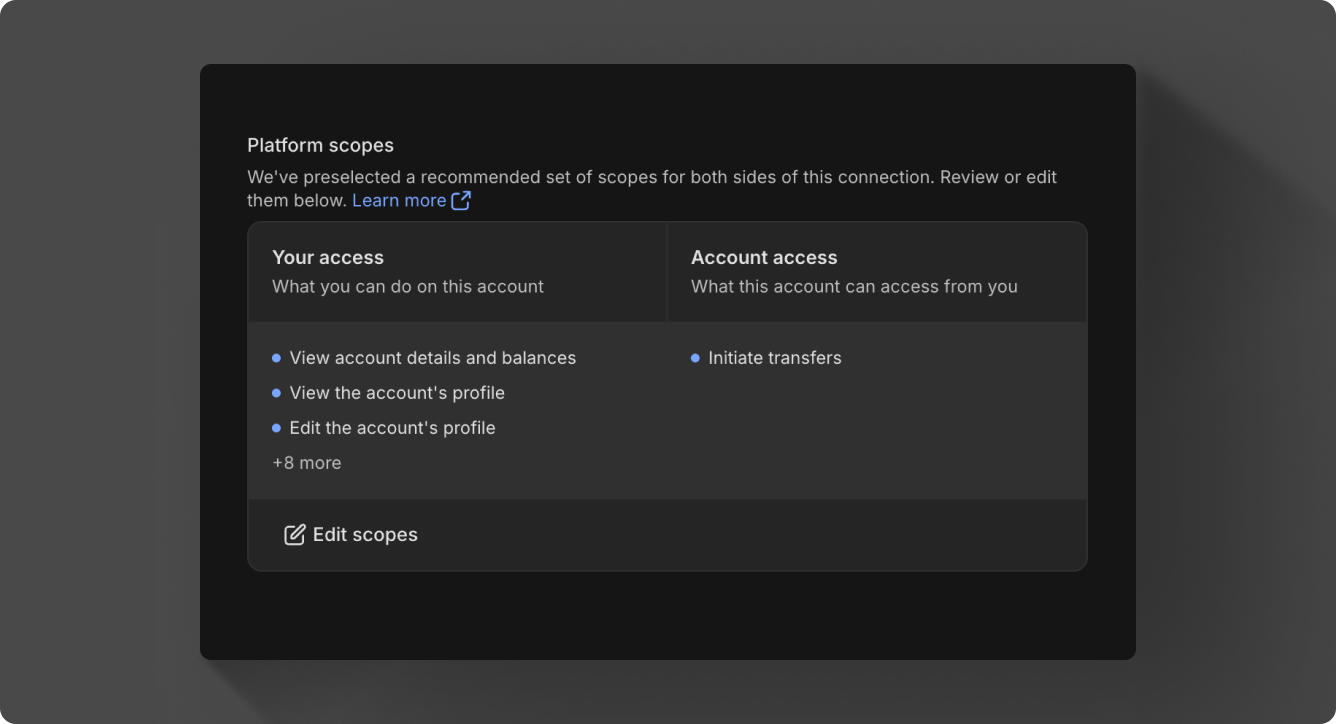
The new account will see which scopes are enabled during their onboarding process, and can view any customers you've shared with them. See the connected accounts guide for more information.
Prefill data
Decide whether to prefill any existing account data. If you prefill data, enter basic information for the account, such as company name, industry, and address.
It is always a best practice to include customer support details for an account, such as a dedicated customer support phone number. For card acceptance, if no customer support phone number is provided, the business phone number may appear on statements instead.
Create and send the link
Optionally provide a return URL and terms of service URL under Advanced options. A return URL is where you would like to send users after they've completed the form. If you need users to agree to your own terms of service, provide the URL in that field.
When you're ready, copy the link and send it via email or SMS. If you have set up brand colors, the onboarding flow will reflect your branding.
The following is a sample request with prefilled data. Hosted onboarding collects the account's acceptance of Moov's platform agreement in the form, so you don't need to send a terms of service token.
curl -X POST "https://api.moov.io/onboarding-invites" \
  -H "Authorization: Bearer {token}" \
  -H "x-moov-version: v2026.07.00" \
  --data-raw '{
    "returnURL": "https://mycompany.com/account",
    "termsOfServiceURL": "https://mycompany.com/terms-of-service",
    "scopes": [
      "accounts.read",
      "bank-accounts.read",
      "bank-accounts.write",
      "capabilities.read",
      "capabilities.write",
      "profile.read",
      "profile.write",
      "payment-methods.read",
      "transfers.read",
      "transfers.write",
      "wallets.read"
    ],
    "grantScopes": [
      "accounts.read",
      "bank-accounts.read",
      "bank-accounts.write",
      "capabilities.read",
      "capabilities.write",
      "profile.read",
      "profile.write",
      "payment-methods.read",
      "transfers.read",
      "transfers.write",
      "wallets.read"
    ],
    "capabilities": [
      "transfers"
    ],
    "feePlanCodes": [
      "b6134307-8922-4a72-bf3c-d0297bbe8a35"
    ],
    "prefill": {
      "mode": "production",
      "accountType": "business",
      "profile": {
        "business": {
          "legalBusinessName": "Whole Body Fitness LLC",
          "doingBusinessAs": "Whole Body Fitness",
          "businessType": "llc",
          "address": {
            "addressLine1": "123 Main Street",
            "addressLine2": "Apt 302",
            "city": "Boulder",
            "stateOrProvince": "CO",
            "postalCode": "80301",
            "country": "US"
          },
          "phone": {
            "number": "8185551212",
            "countryCode": "1"
          },
          "email": "amanda@classbooker.dev",
          "website": "www.wholebodyfitnessgym.com",
          "description": "Local fitness center paying out instructors",
          "taxID": {
            "ein": {
              "number": "123-45-6789"
            }
          },
          "industryCodes": {
            "naics": "713940",
            "sic": "7991",
            "mcc": "7997"
          },
          "primaryRegulator": "FDIC"
        }
      },
      "metadata": {
        "property1": "string",
        "property2": "string"
      },
      "foreignID": "4528aba-b9a1-11eb-8529-0242ac13003",
      "customerSupport": {
        "phone": {
          "number": "8185551212",
          "countryCode": "1"
        },
        "email": "amanda@classbooker.dev",
        "address": {
          "addressLine1": "123 Main Street",
          "addressLine2": "Apt 302",
          "city": "Boulder",
          "stateOrProvince": "CO",
          "postalCode": "80301",
          "country": "US"
        },
        "website": "www.wholebodyfitnessgym.com"
      },
      "settings": {
        "cardPayment": {
          "statementDescriptor": "Whole Body Fitness"
        },
        "achPayment": {
          "companyName": "Whole Body Fitness"
        }
      }
    }
  }'
Pricing plans & disclosure
The new account must accept the fee plan and agree to the pricing disclosure before the plan can go into effect. You are responsible for communication regarding pricing models. If a fee plan changes, you're responsible for communicating the change, and the new plan needs to be accepted by the account.
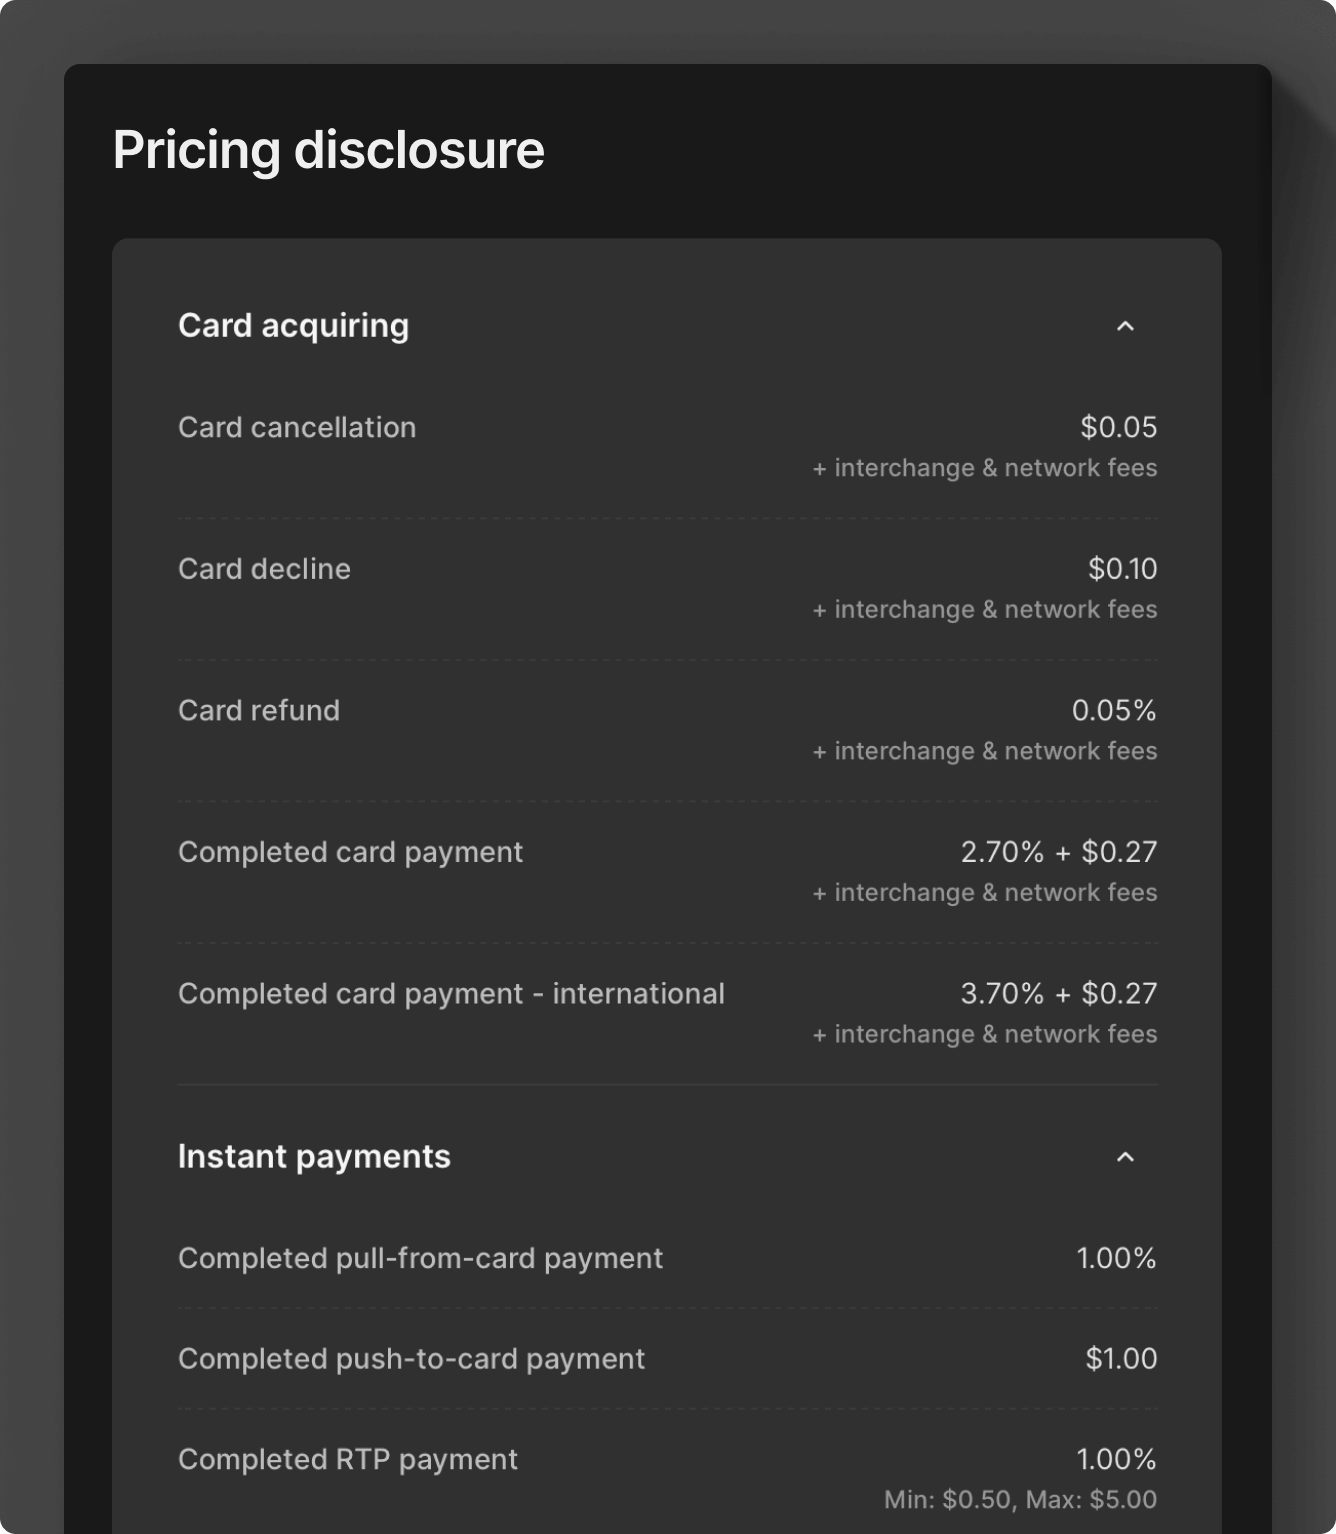
Once the plan is in effect, Moov charges fees from billable events to the account's wallet in real time. See charges and reconciliation for how those wallet transactions look.
Manage onboarding links
Track an onboarding link's status under Accounts > Onboarding links. You can see whether an account has been created and the form started. The Dashboard also alerts you if newly created accounts have any outstanding capability requirements.
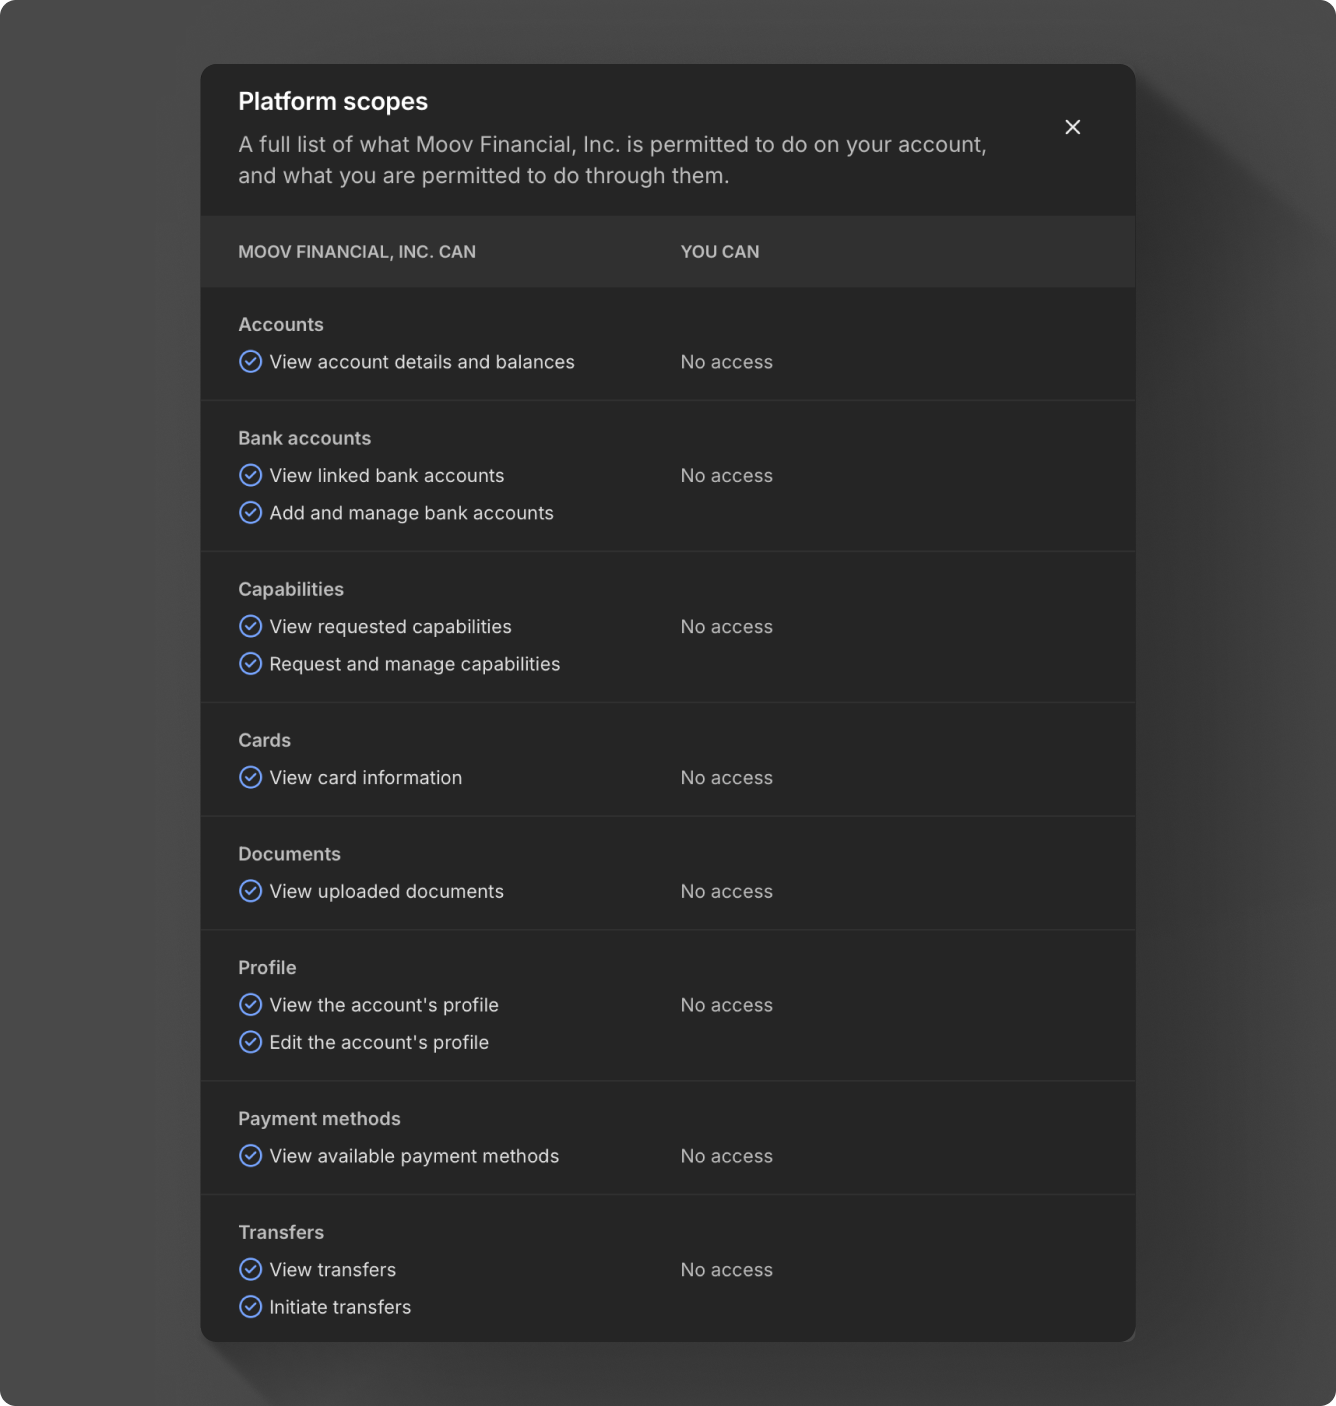
To view the scopes enabled on an account, open the account's Settings tab and select View under Platform scopes.
List all invites using the API. The response has the code for each invite. The onboarding link code is required to retrieve an individual invite or revoke an invite. The redeemedOn timestamp shows whether the link has been used.
Revoking an invite renders the link unusable.
If an account can't be verified after onboarding, send a resolution link so the account holder can fix requirement errors.